Fix RO Water Pressure Issues
How to Fix Water Pressure Issues From Your RO Water Tank
RO Water Tank Loses Pressure After Releasing Only A Few Cups Of Water
We've been using a Reverse Osmosis Water Filtration System in our home for many years now, and its slowly been losing it's ability to release the entirety of the 3 gallon tank to no more than a few cups of water from the water spigot, tonight. I didn't install the filtration system, so I don't know how it works, but I have been changing out the filters on a somewhat regular basis. I have also heard from a water representative at a water filtration store that you need to change the water tank out every few years, or clean it or something. Not sure about that.
Nonetheless, I really know nothing about installing or maintaining an RO water filtration system, other than changing out the filters. And again, the problem is that, we've slowly been losing the ability to release water some fair expectation of water from a 3 gallon water tank (I don't even know it's 3 gallons.. just taking a wild guess). So tonight, fed up enough to look up how to fix it, and found this article that pointed me in some direction that got me somewhere: Troubleshooting Slow Reverse Osmosis Water Flow: Causes and Solutions
-
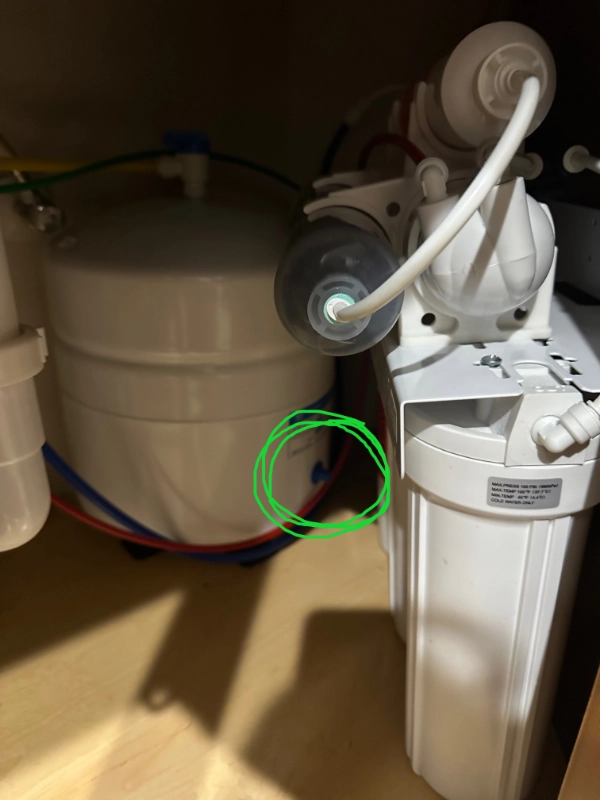
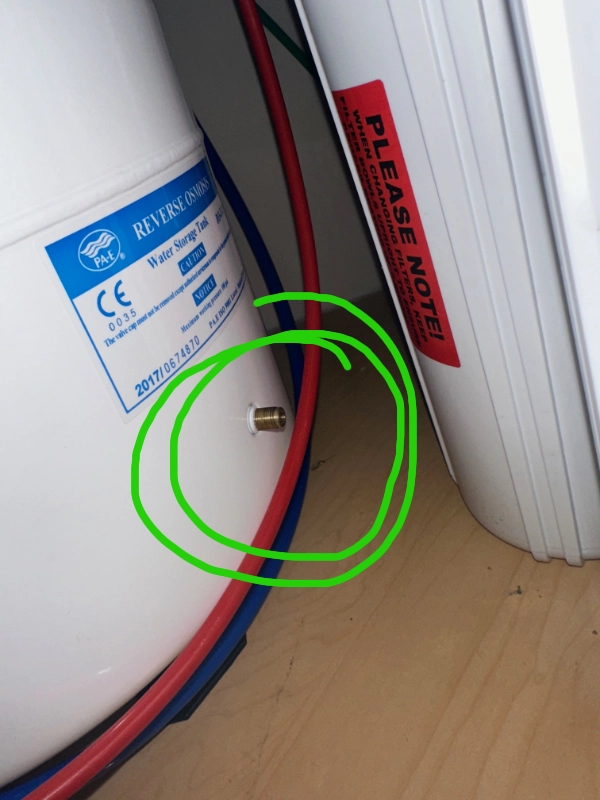
Circled Location Showing Capped Air Valve on Reverse Osmosis (RO) Water Tank
Circled Location Showing Capped Air Valve on Reverse Osmosis (RO) Water Tank
-
Location Showing Air Valve on Reverse Osmosis (RO) Water Tank
Location Showing Air Valve on Reverse Osmosis (RO) Water Tank
Notes on How to Check and Fix Water Pressure in RO Water Tank Filter System
-
Locate Reverse Osmosis Water Tank
-
Turn off all water to the system, and drain / release the water in the system
-
Disconnect all the water lines that you need to, in order to remove the water tank from its location
-
Remove the reverse osmosis water tank from its location and drain all the water from the tank
-
Use a tire pressure gauge to check the PSI in the water tank. It should be around 7-8 Pounds Per Square Inch, according to this article.
-
If pressure is low, carefully fill the tank to about 7-8 PSI. Also according to the article, there is a bladded in the tank that can rupture if too much pressure is added.
-
Once pressure is achieved, I assume, connect everything back, and see if it worked!
Estimated Cost
$0 - $30 USD
If you are only checking air pressure and adding air, you may already have all the tools.
Estimated Time
10-60 Minutes
Depending on water tank accessibility and knowledge on maneuvering around all the plumbing
Estimated People
1 Person
This task can be completed by a single individual.
Some Tools and Materials Needed for Repairing a Sagging Fence Gate Door
Materials and Supplies
Hand Tools and Other Equipment
Temporary Conclusion to Fixing Water Pressure Issue In RO Water Tank
Due to the P Trap blocking my ability to fully remove the RO water tank, I was unable to fully remove and drain all the water from the tank. However, I was able to maneuver the tank around to find the air valve, which I never knew existed until tonight.
I bumbled it a bit, releasing water and pumping in air, with the water in it.. it appeared to be able to release water in a more steady and stable stream. I figured I wouldn't be able to remove the tank unless I undid our sink drainage P-trap, and I wasn't looking forward to that. On the other hand, upon further thought as I write this, I think I could likely keep pumping in air to help push out all the water, if needed.
Nonetheless, I got the pressure to be around 7-8 PSI with water tonight, I'll see how it goes in the next day or so to see how it lasts. I may need to completely drain it, but I'll update here on that soon.
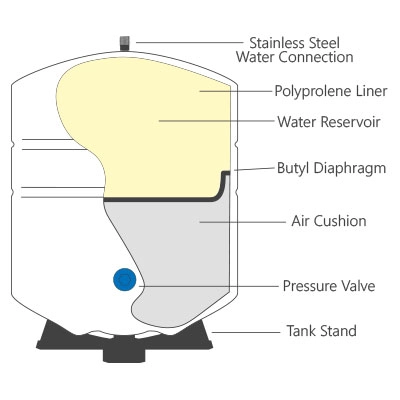
UPDATE: After a day or two monitoring the water pressure from the water spigot, it seems steady - and I suppose looking up a cut away diagram should help you / me understand the way the air pressure works to push water up through the spigot.